Making a Brass Pistol Buttcap
 Buttcap for Jacob Kuntz pistol
Sometimes a commercially available casting is exactly what you need to finish a piece right but sometimes castings need considerable alterations to make authentic to the gun you're building. Though there are many high quality pistol castings available, using a buttcap casting means that your work must conform to that particular shape. This isn't necessarily a bad thing, as it can be good to let the shape of an original part dictate the shape of the finished piece. In the case of a Jacob Kuntz pistol shown below, a commercial buttcap was simply the wrong shape – I needed something that would fit my stock shaping, not the other way around. Outlined below are the rough steps I take to make my own pistol buttcap when commercial castings won't do.
Materials: Brass sheet available from Ace hardware, approximately .090 thick.
Materials: Brass sheet available from Ace hardware, approximately .090 thick.
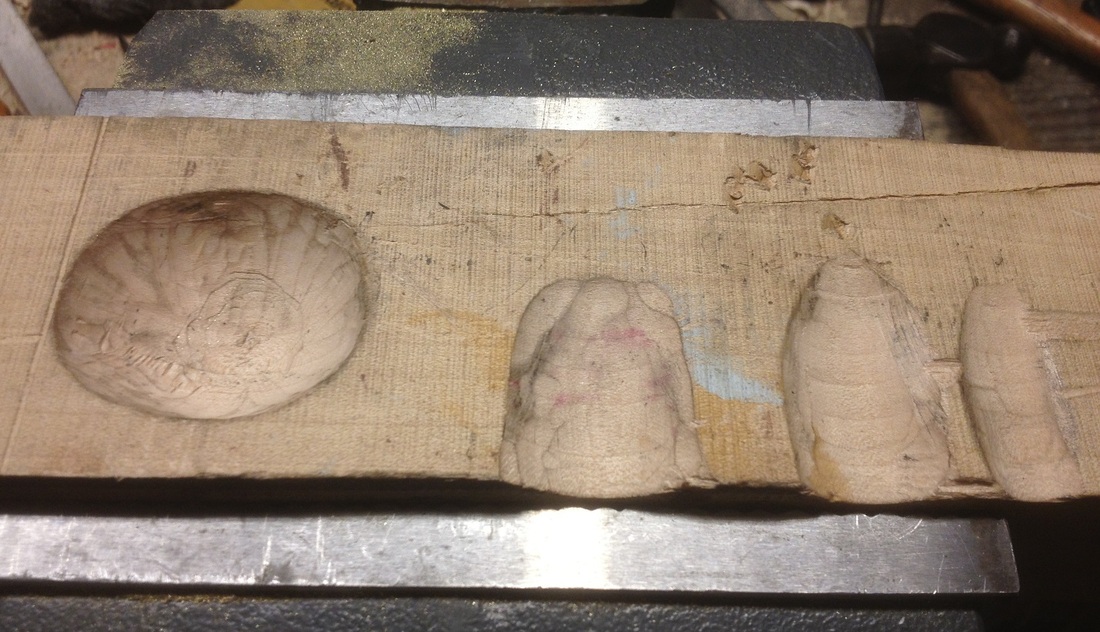
Step one: Only one half shown. Take a block of hard maple and on one side carve a series of round-bottom holes in sequence from shallow to deep. On the reverse side create open ended dishing in sequence from shallow to deep, and narrow to wide. Any excess space between recesses can be filled with different shapes and depths – it's good to have a wide variety available to use. Since we're using brass, this maple mold will be more than adequate for your shaping needs.
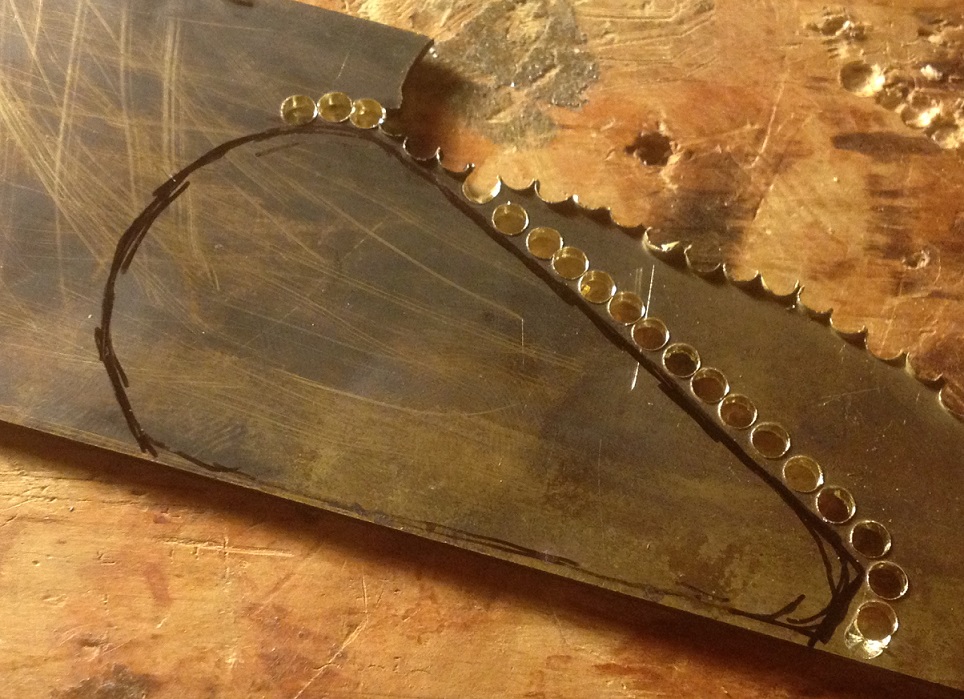
Step two: You can approximate the size of your buttcap with a paper pattern, but simply taking a flexible tape measure and noting the length and width of your buttstock will suffice. As you peen the blank into shape, it will stretch slightly, so you don't need to allow for too much extra. A jewelers saw would work just as well and create less waste – I ran out of blades before this, so a drill press was used to “outline” the piece, followed by a coping saw to break through the web between each hole. This particular buttcap is narrow and shallow - a deeper cap would require a wider blank.
|

|

Step three: After lots of filing to clean up my drill hole mess, I have my blank ready. At this point I have heated it to a dull red and let it cool, to anneal the brass before working it. As we go through the primary forming steps, we will anneal the piece after each new shape is formed. Notice the maple block, with different depth holes.
A Word of Caution: Brass will work harden as you peen it or bend it. Continuing to shape a work-hardened piece WILL result in cracking, which will only worsen as you continue to shape it. Once a crack has formed, it is very difficult to repair the piece and continue to form it. Anneal the piece often – it will be noticeably easier to peen and shape, and will not crack. You can anneal it as often as you want without damaging it.

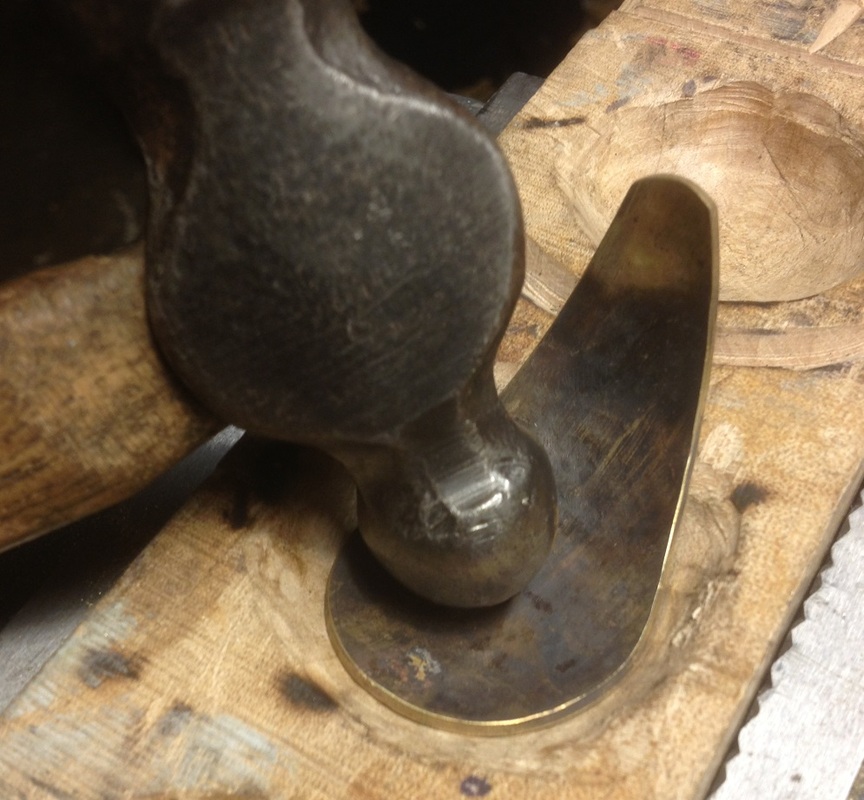
Step four: Begin to shape the flat blank by holding it in your large open-ended form – peen with multiple light taps to get things going. Rotate the brass in the form to create an even radius if possible. As you peen it, attempt to peen evenly on the right and left side. Doing so will assure that your buttcap remains symmetrical and the “tail” remains aligned with the stock. Remember: if your tail is pointing to the left, peen the right side to create tension in the edge and pull the tail back to center. This only works to a degree, as too much peening spreads the material and pushes the tail away. There is a happy balance that I am still discovering myself. You can also put it in the vice and twist it back to alignment.
After initial peening of the entire piece, your buttcap should look like this. It's still very shallow, and should have an even radius from side to side and front to back. Depending on the shape of your grip, the tail may be straighter or more curved – this is easy to alter later in the process.
|
|
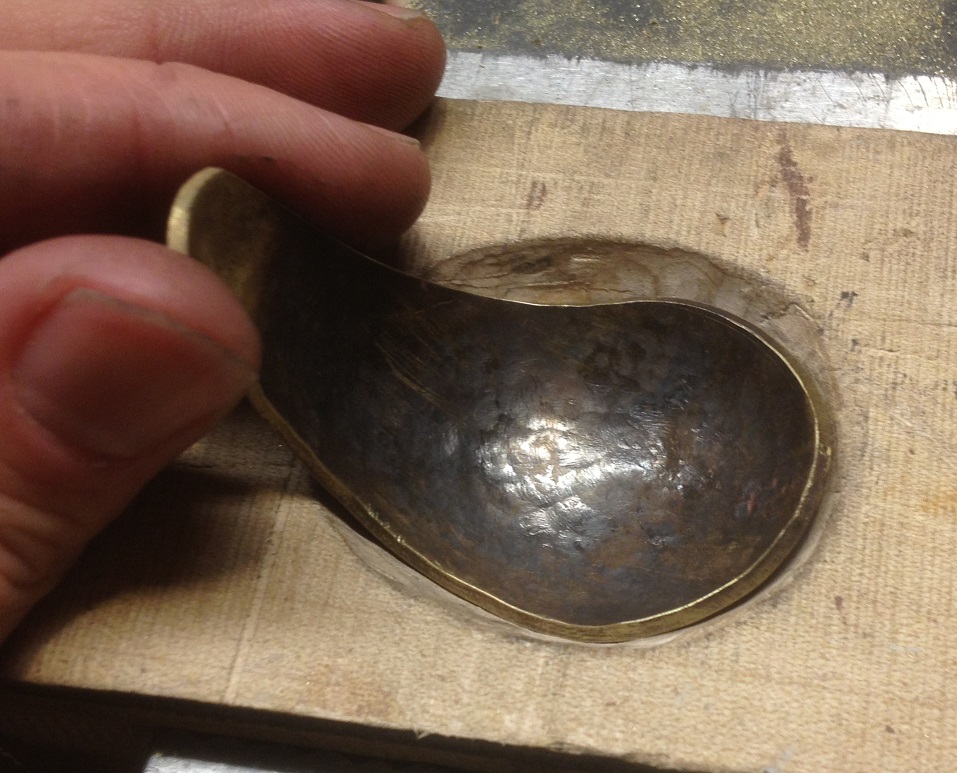
Step five: Anneal your piece, and move it to the next deeper hole. The edges of the buttcap will be touching the mold, leaving a gap between the bottom of the brass and the mold. This is where you need to use a heavier hand with the hammer. Peen the buttcap evenly around the entire “cup” portion and give it some solid whacks to drop it into the bottom of your mold. Peen the tail as much as you want to create more curvature. Study original pistol photos for inspiration if possible. Continue to anneal after each section, and stop when you are satisfied with the depth of your buttcap.
|
|

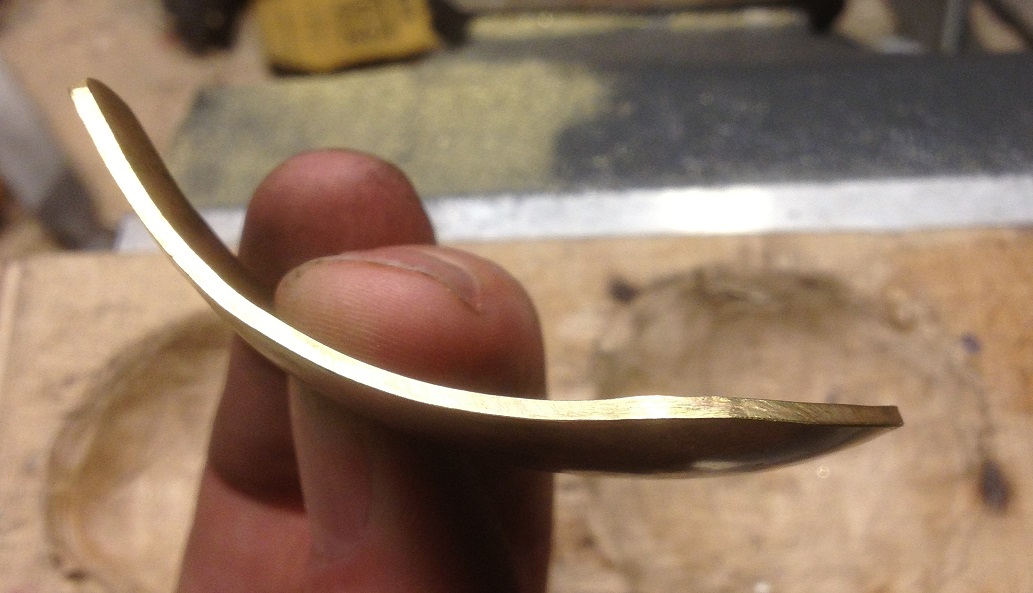
Step six: After the radius and depth of the buttcap have been established, it's time to work on the tail portion. If you have a broad grip, then the tail will remain somewhat flat when viewed from above. In the case of this Kuntz pistol, the grip has a soft ridge that requires a tighter radius on the brass. Using the open ended molds, peen the tail until it has the radius you desire. Work the entire tail right into the cap portion using larger molds to evenly graduate the radius.

|
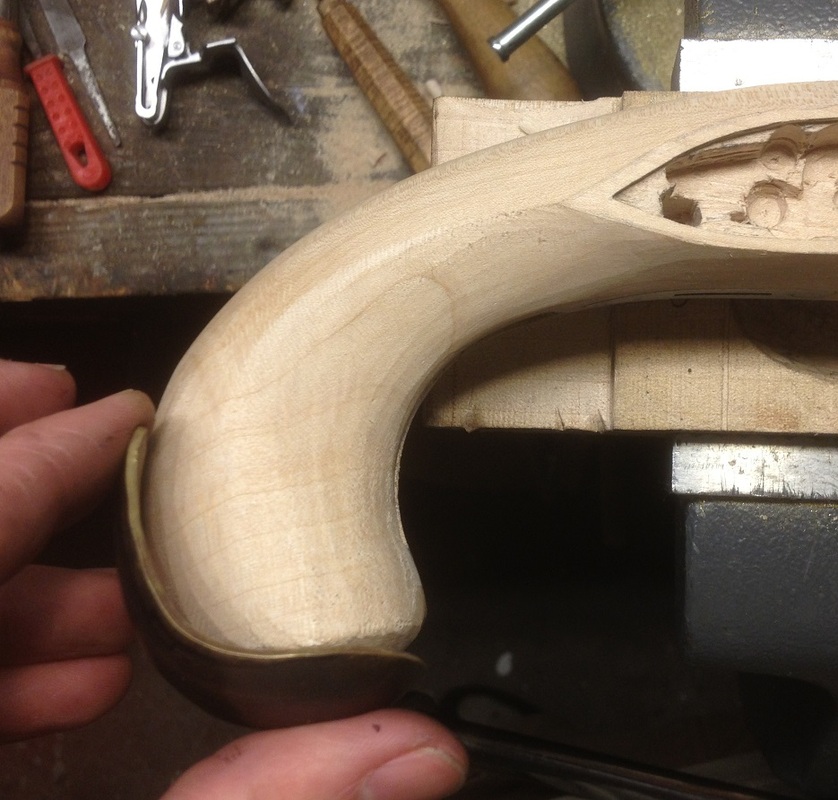
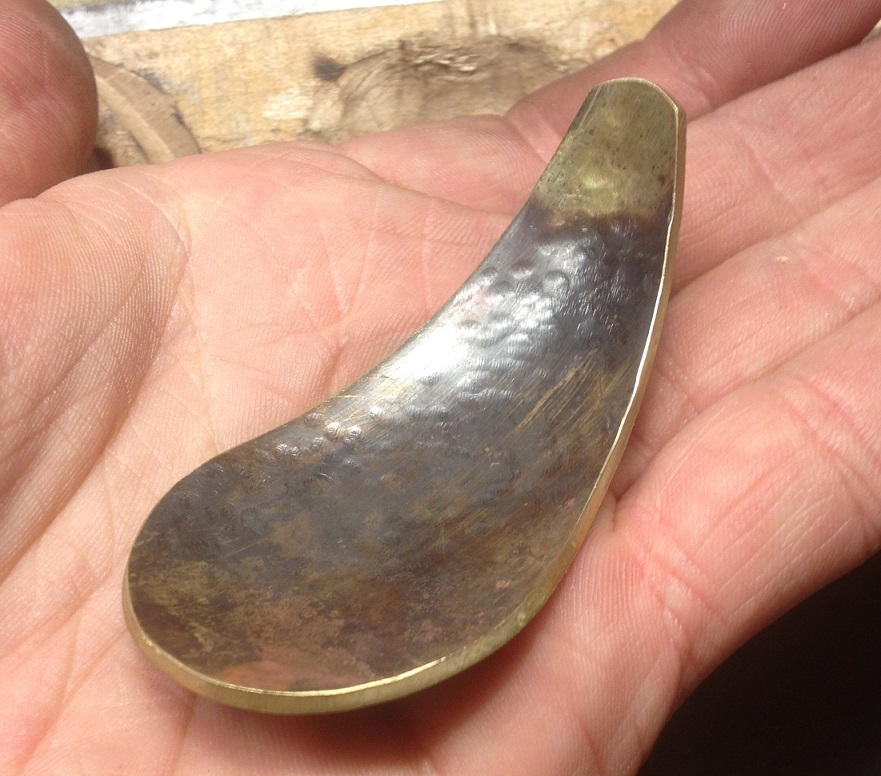
Finally – this is beginning to look more like a buttcap! At this point, check your piece often by comparing the radii with your pistol grip. As mentioned before, I like to have the grip somewhat close to finish dimension, but it's much easier to shape the wood to the metal, than the other way around.
|

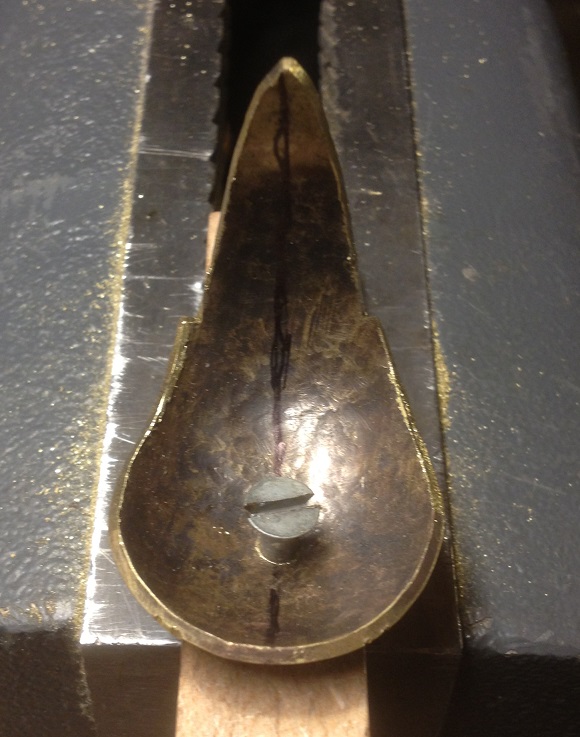
Step Seven: With a fine tip sharpie, draw your centerlines on the outside and inside edge of the buttcap, then draw where you want your final edge to be. At this point I drill an undersized hole where I want the final screw to go. Screw the buttcap into a block of maple, then grind or file the edges until you have achieved the desired shape. This makes for a lot of chatter and horrid noise - adjust the angle of your file to help make a cleaner cut on the un-supported edges. This buttcap had a step in the tail not found on many other pistols.
|
|
Checked for symmetry, this buttcap is filed and ready for inletting into the grip. Don't worry about cleaning up the exterior just yet – you'll do that with a file as you bring the wood down to final dimensions, flush with the buttcap. When you finally install your buttcap, you can dress the screw one of two ways: use a slightly domed screw, or file a screw flush with the brass. Both methods were used on originals, though I have seen more of the latter technique. It's not only easier, but ensures that you tighten the screw to the same location if you ever have to disassemble the piece.