Below is an outline of the method I have developed for carving stocks that serves my needs while building 18th-century style arms. There are as many ways to carve as there are people who carve stocks. This method does not require a set of four dozen gouges and chisels, and relies on a blend of incised and relief carving techniques. I'm using photos taken while carving a rifle in the style of J.P. Beck. It's not uncommon to see American arms with scraper and chisel marks in their finished backgrounds. This is not to suggest that it is "sloppy", but that things were done in a more workmanlike manner. Most of the work I see today is entirely over-finished in comparison to the period arms we are emulating.
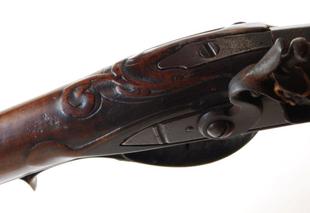
The first step to well executed carving is to study, study, study. If you're making a particular style of rifle, your carving must also reflect this. If you are new to rifle building, it's best to copy original work, as it will help you develop a better understanding of basic baroque and rococco styling. There is often an "endearing" level of quality to the decoration on early American arms, and you may or may not choose to incorporate these same "folky" renditions into your work. I like to blend designs from a single period artist into my work, making it recognizable as a particular artist, but uniquely my own as well.

Tools used are as follows: 60 degree parting tools (one by Swiss Made/Pfiel, other is Japanese), 1/2" flat chisel with edges rounded and sharpened, 1/4" shallow gouge, 1/2" (roughly) shallow gouge, 11/3 Pfeil veiner, 1/16" japanese veiner, three sizes of file-rasps (home made), several small scrapers made from old scroll saw blades, and about a dozen fine riffler files picked up second hand on Ebay (please don't spend hundreds of dollars on these, you don't need new ones).
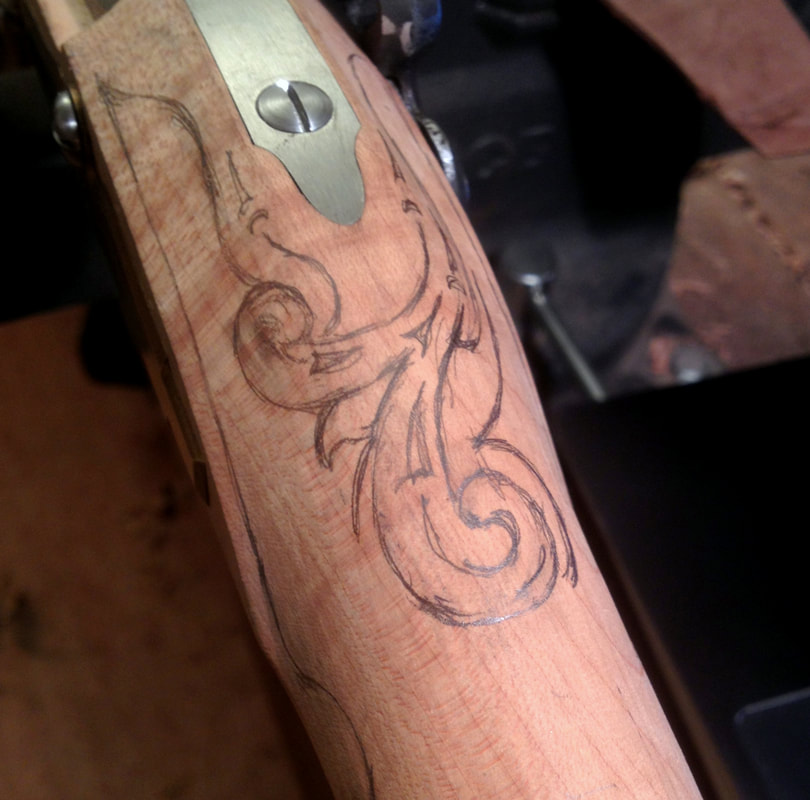
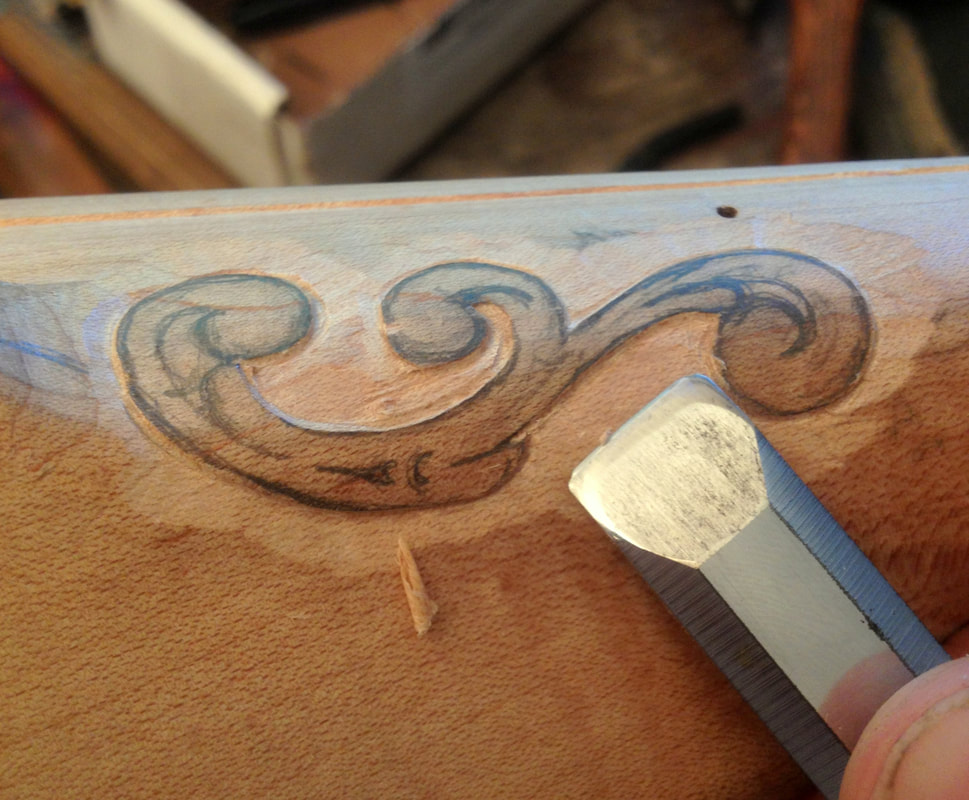
Get out your eraser, because you'll draw two dozen renditions before being satisfied with your design (once you put chisel to wood, you'll still edit on the fly anyway). Don't stop at "ok", draw it out with as much detail as you like, and take photos so you know where to put details once you remove the background.
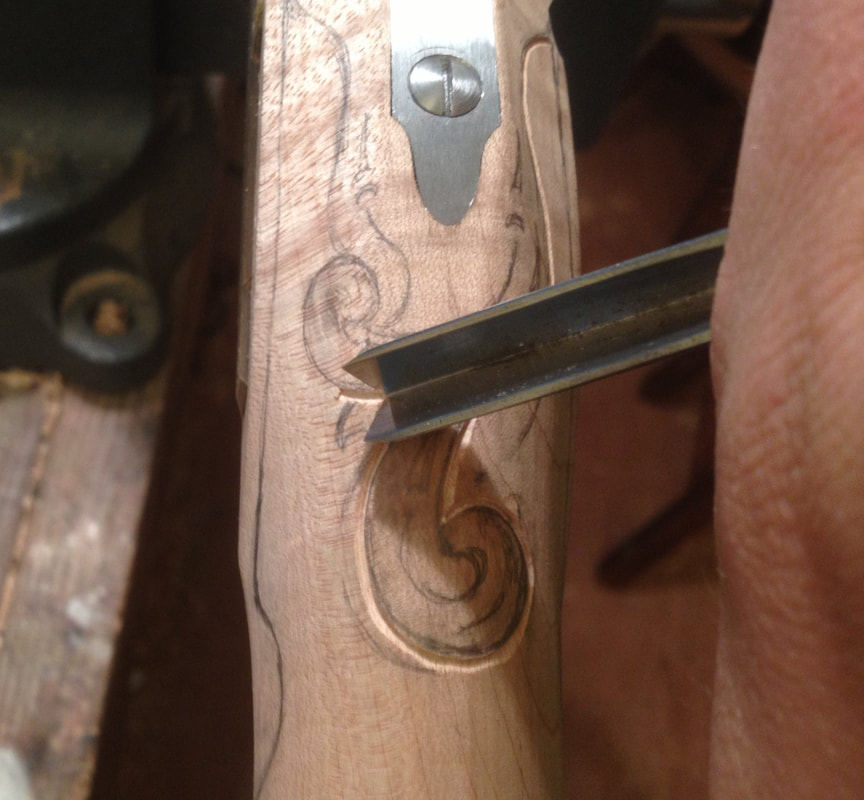
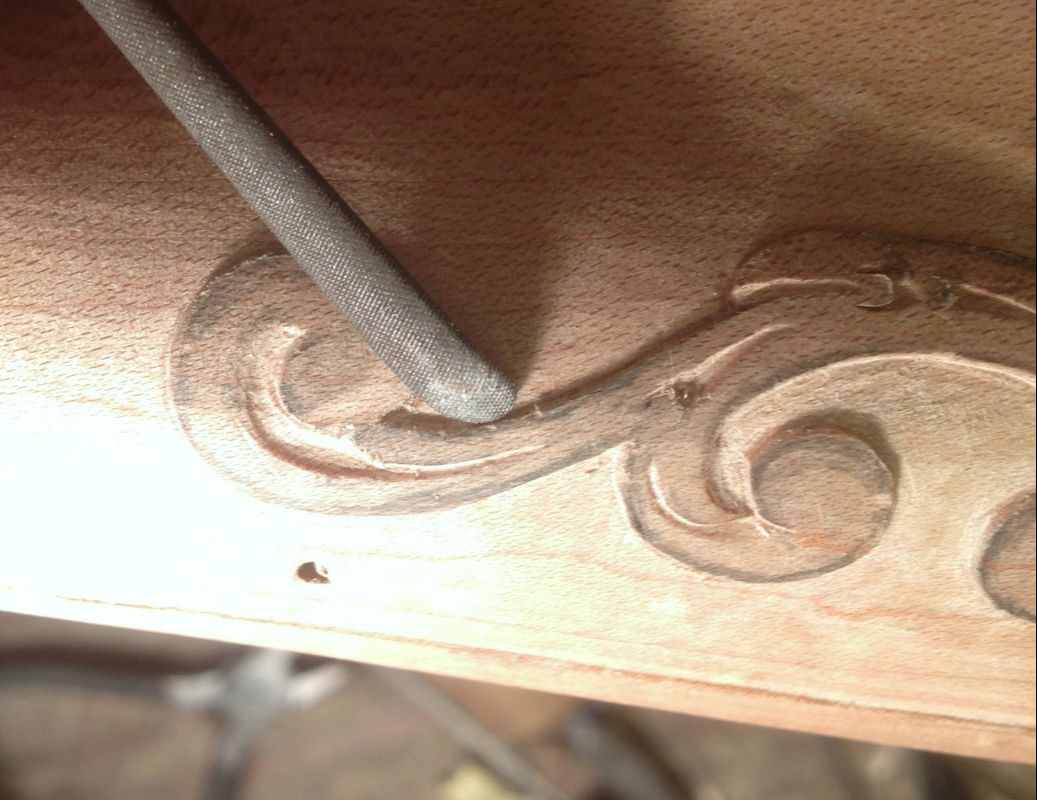
Using the 60 degree parting tool, "trace" along the outline of your carving, leaving the edge of the chisel at 90 degrees to the relieved portion. I use a light wooden mallet to chase the tool, much like with engraving, which gives me better control of steering and throttle. Depth is controlled by how wide your line appears - work on keeping this as uniform as possible.
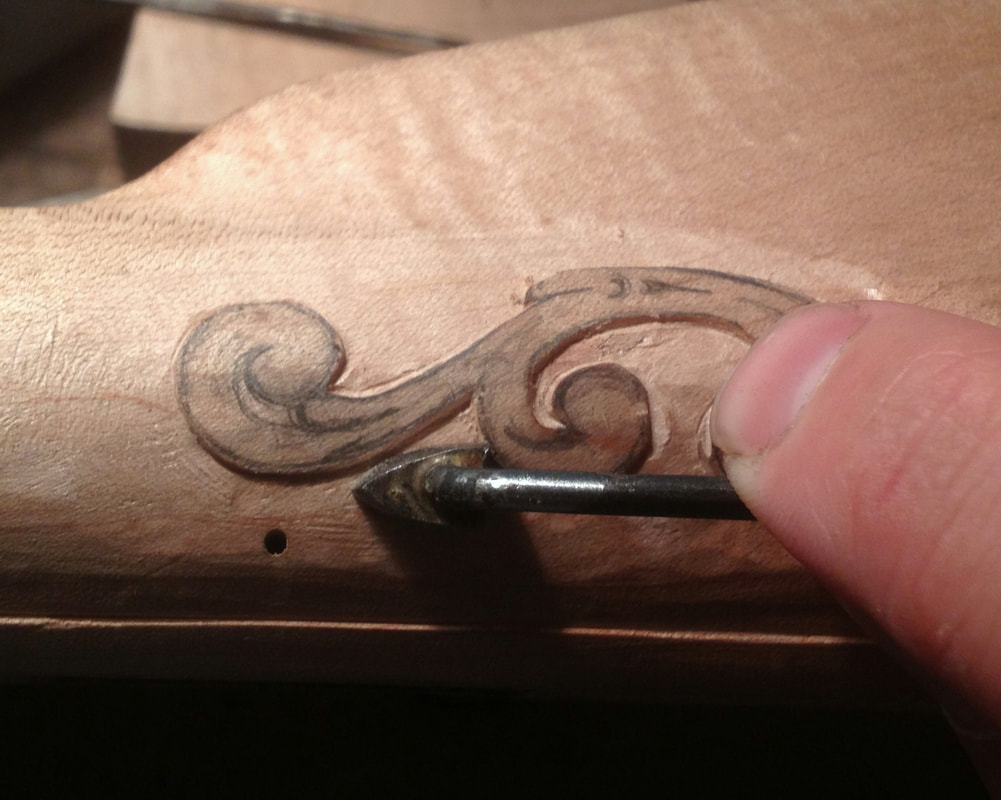
The first step in removing the background is to lay the parting tool on its side, and use the heal of the tool to ride along the incised portion. The lower "wing" of the tool will remove a small portion of the background, leaving a defined edge to your raised portion.
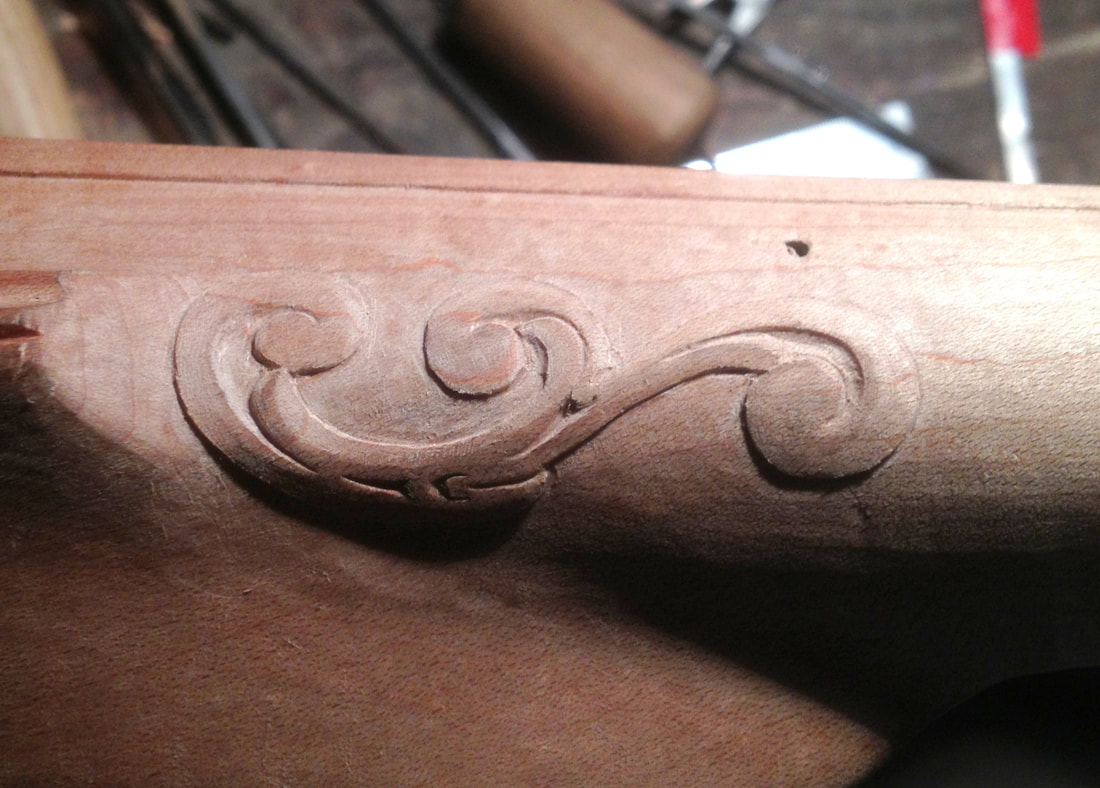
With the main portions relieved, the tedious part of removing and leveling the background can begin. I use a variety of tools for this - starting with the 1/4" and 1/2" shallow sweeps. These must be honed to a shaving edge, as you move across the grain, overlapping the previous cut to a uniform depth. No need to go crazy here, you may only remove 1/32" or so - most good relief carving on firearms is exceptionally shallow. A small chisel made from 1/16" piano wire (hardened & tempered post shaping) can be used to access particularly tight areas of the design.
I use three course file pieces with handles brazed on to level the background fully, which leaves a surprisingly smooth surface. They're shaped like a tiny iron, with a pointed tip to get into tight spots. The flat sides allow me to get right next to the raised portion without risking running over them. Yes, the temper was removed during brazing, but a water quench at dull red still makes it hard enough to hold an edge while shaping wood.
Here's where the scrapers come in, and everything begins to blend. These are sharpened just like a cabinet scraper, and level out the background with exceptional uniformity and a light touch. Careful not to scrape over your raised elements. I have some that are dead flat across, and others with a slight radius, so as not to put a scratch in the background. Remember when relieving, that there can be a subtle arc to the background, and it need not be completely flat. The background may "dive" slightly towards the relieved portion - this is OK! You may use 400 grit sandpaper to do final smoothing if you prefer (I don't)
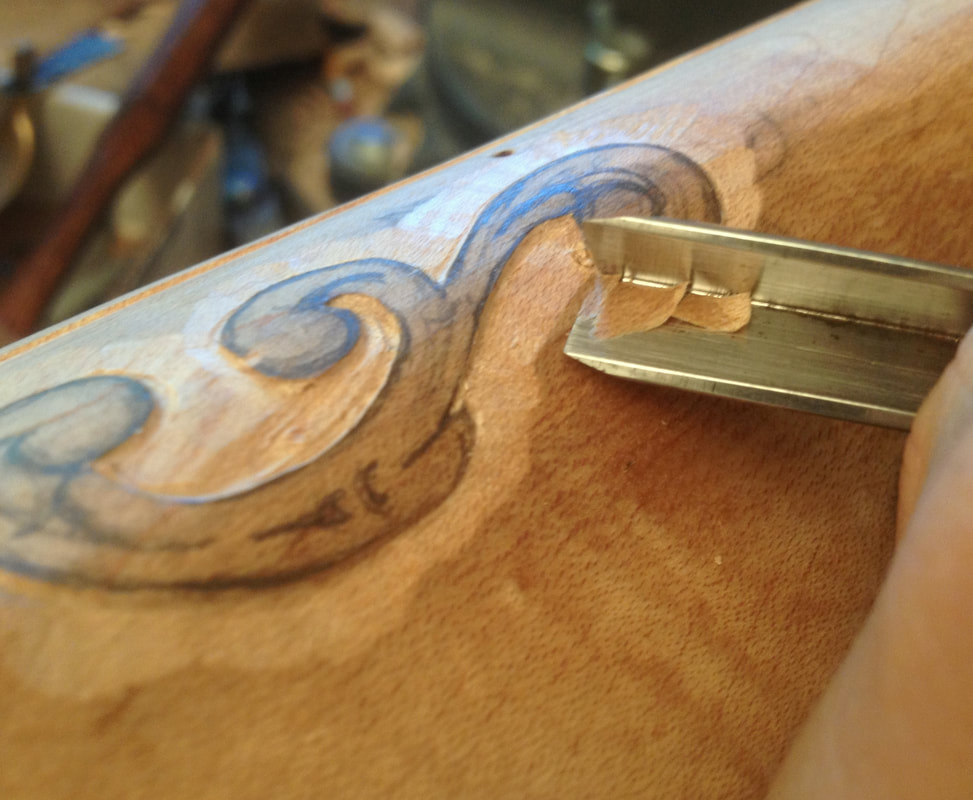
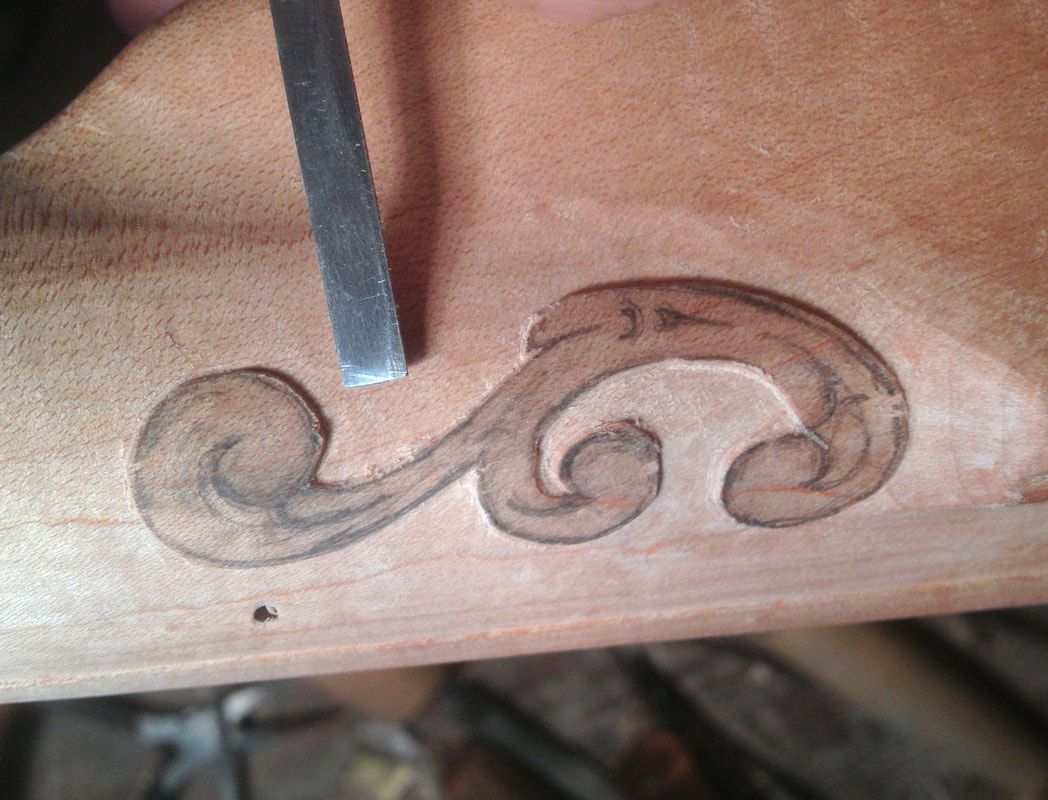
If at this point your design has some rough edges from leveling, or perhaps it doesn't appear deep enough, you may use the 60 degree parting tool to retrace your design slightly deeper. Essentially this creates the illusion of depth by making a subtle incised line around the raised portion. When stained, this will make the carving "pop".

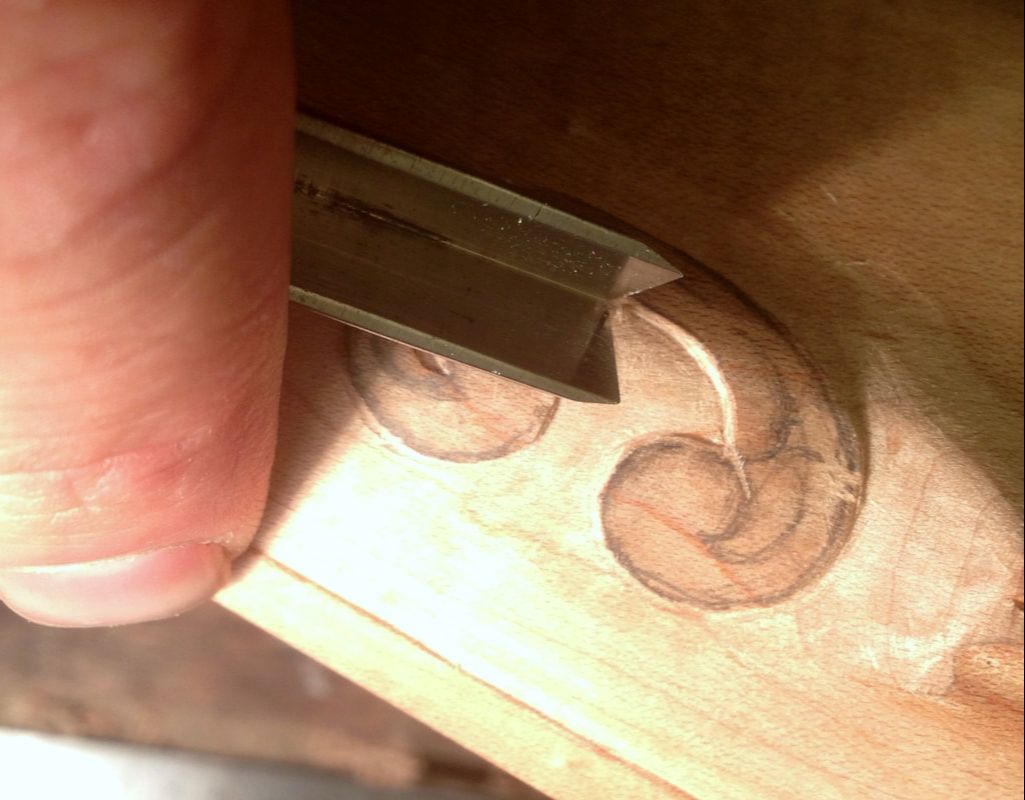
Now the fun part! Modeling is what makes the shallow carving "pop" from the background, and it is best to study original work before putting chisel to wood. A subtle hand is required to shape the scrolls and leave just the right about. I prefer some crisp edges, while other gunmakers prefer very soft and rounded carving. You'll find both on historic arms. It's easy to get overzealous and model your carving too much. Remove a small amount, look at the whole picture, then go back and make final adjustments.
I use about four small gouges for most of my modeling, cleaning up any fuzzy areas with a variety of rifler files with convex faces. Watch the direction of your wood grain, and carve with the grain on an uphill slope (so the gouge doesn't dive following the grain).
|
|
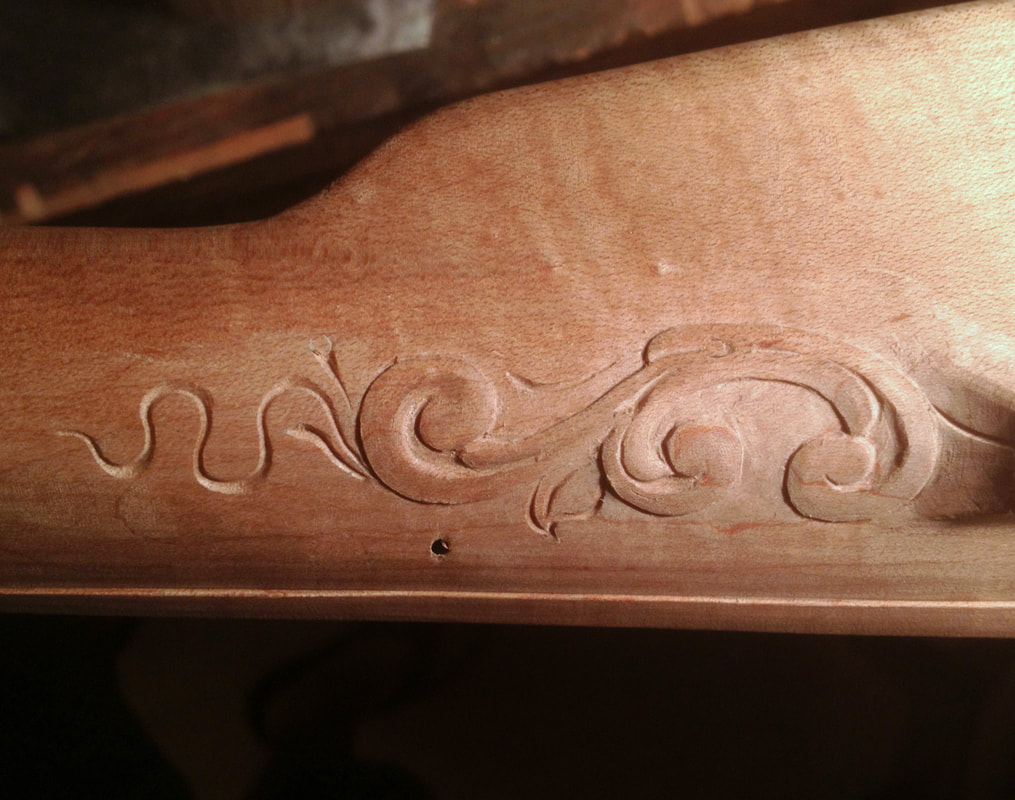
In the case of this particular rifle, the background was given a few incised lines to accentuate the raised portion. These must be executed with care, starting shallow and widening the line for visual depth by carefully altering the angle on the parting tool. It's best to practice before attempting this on your stock. My technique to finishing the carving comes from the principle that the original gunsmiths weren't spending hours slaving over every detail. I struggle with this enough while building the gun, and there's no need to do so on carving unless you're looking for 21st century perfection. Burnishing the carving will usually suffice to clean up any fuzzy areas and highlight sections that need final adjustment. I use a burlap bag and a tightly bound sisal brush to knock off any fuzz from the carving both prior to and after staining with aquafortis.

Finishing of stocks is another tutorial entirely, and something I still experiment with on each new gun I make. Remember that each antique gun is unique in little ways, and every maker varied the designs from one gun to the next.