Silver Inlay Signature Escutcheon in Barrel
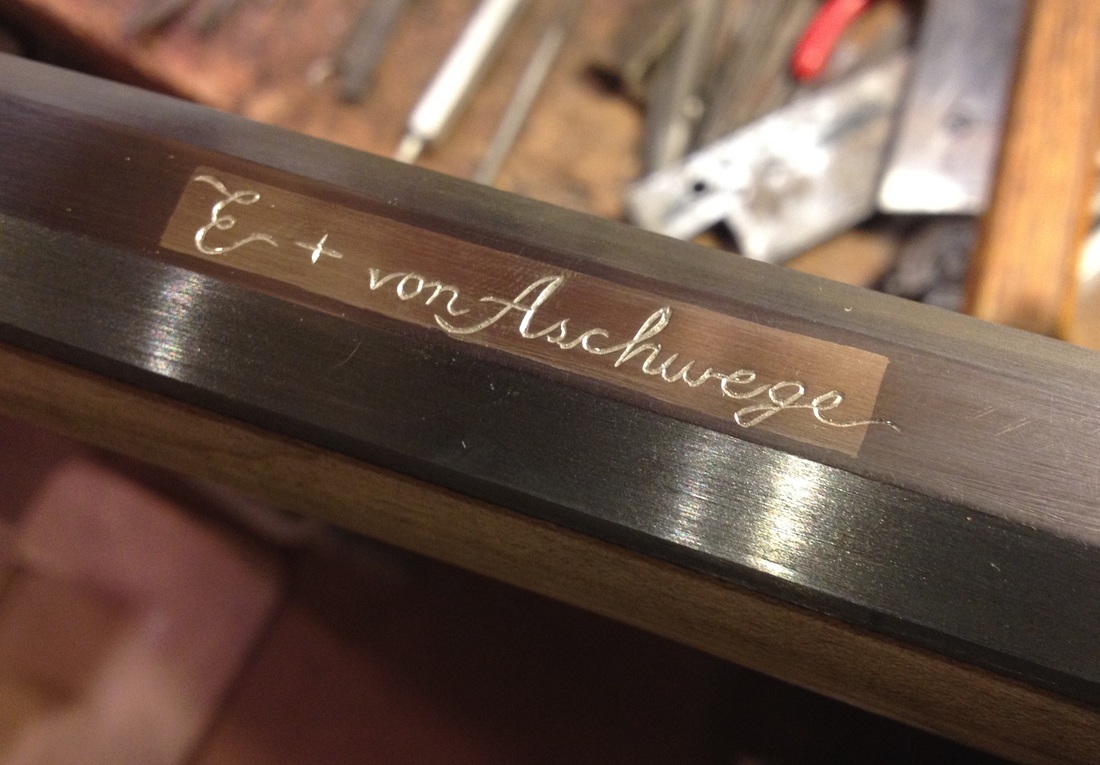
A number of original rifles have silver or brass escutcheons inlaid into the top flat of the barrel aft of the rear sight for the maker's signature. This eye-catching detail at first seems like an intimidating extra step to perform, however the process is a lot less complicated than one would first think. Below I've laid out the steps I take when inlaying a silver or brass escutcheon into a barrel. The same techniques are used on lockplates, tomahawk heads, and in other metal-in-metal inlays on a rifle.
Step 1: Scribe your layout lines onto the barrel, then take a square graver and engrave the outside border of your escutcheon into the barrel. After your initial lines are cut, lay the graver on its side and slowly trim away the material to the inside of your line. Be careful not to nick the edge of your initial engraved line, as keeping this edge clean will result in a straighter edge on your final inlay.

Step 2: Begin the process of removing the background material with a flat chisel. Work in small strips at a time, like mowing the lawn, to get the most even depth. The photo shows a larger chisel to clean up high spots in my mortise. I started with a chisel about half as wide to remove the majority of the background. You only need to remove .02 to .03" depth here. Going deeper is not necessary to hold the inlay in place.

Step 3: After background is removed and leveled, I use a square graver on its side to undercut a slight draft into the perimeter of the mortise. Exercise care when doing this, as any irregularities in the perimeter will show up in the finished inlay. I use a small round bottom graver to raise lots of little teeth in the flat of the mortise. The teeth in this photo are on the large side - smaller teeth would be perfectly adequate. The combination of the undercut and the teeth will ensure the inlay never comes out.
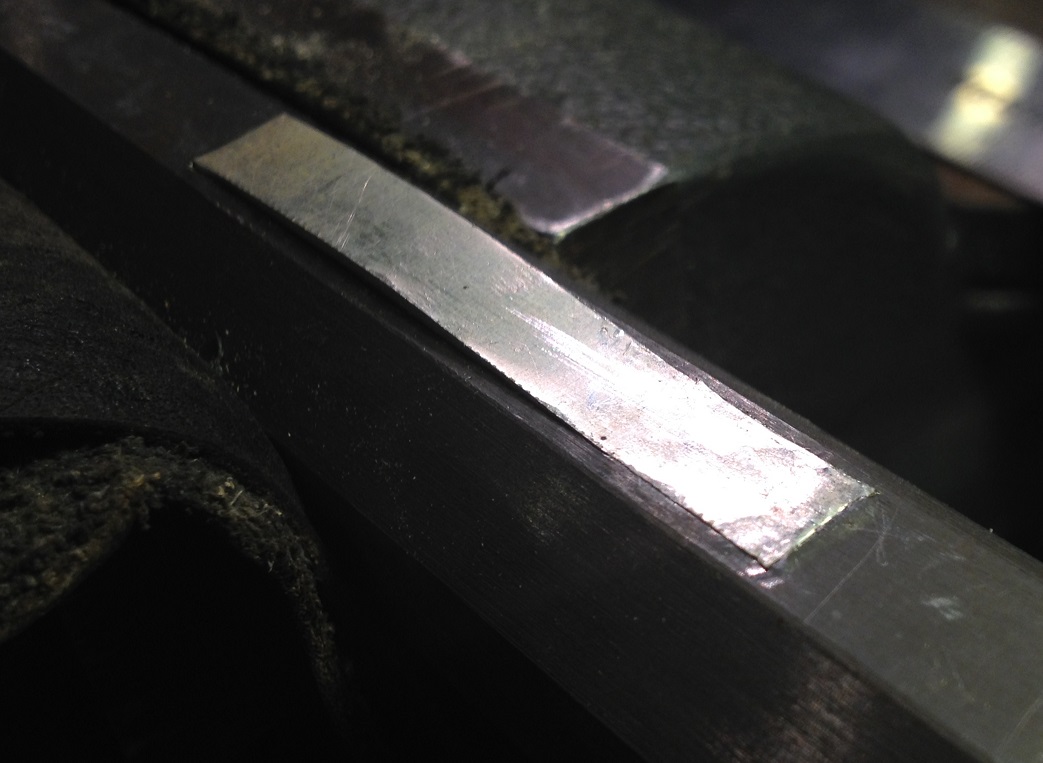
Step 4: Cut your inlay to size, you should be able to lay it on top of the mortise with a few thousands of an inch gap all around. The silver I used was .03" thick to fill the .02" mortise - this leaves plenty of material on top leftover. The gap will be filled when we peen the metal together. Start your inlay into the barrel at one end with light taps from a small ballpeen hammer. Apply heavier hits to set the corner into place, but do your best to only hit the silver, as your goal is to swage the silver into the steel mortise.
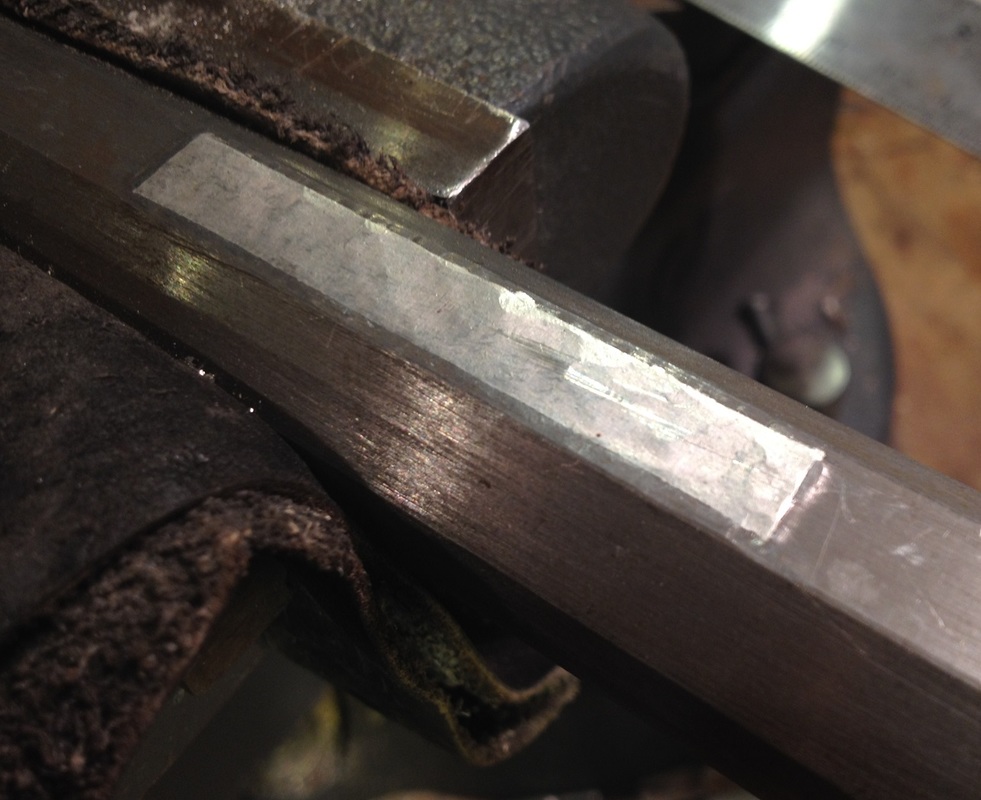
Step 5: With one end firmly set and peened into place, tap the opposite end into place and set firmly as you did the first end. This will leave the middle of the inlay high. With both ends set, you can now tap the middle into place and really push the silver into the mortise. Work around the perimeter, being sure to push the silver into the undercut you made earlier.
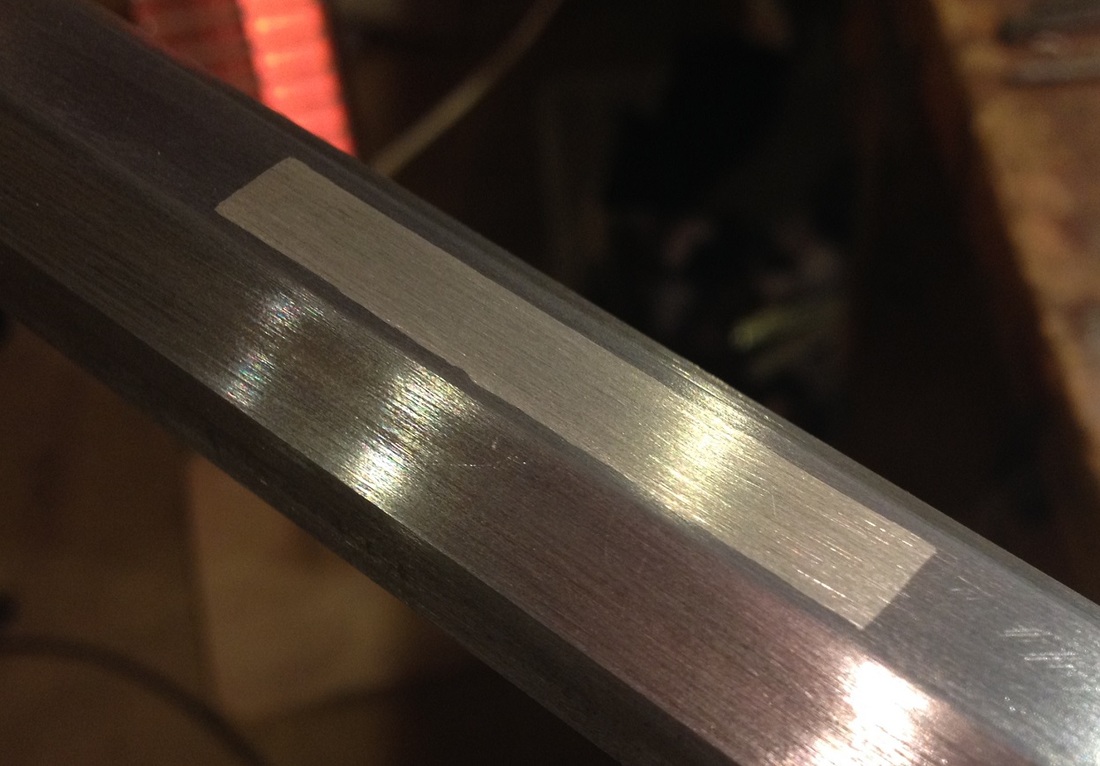
Step 6: With the inlay fully peened into place, you may drawfile the excess material from the barrel and polish. The silver to steel transition should be perfectly seamless and smooth. Original makers did not just stick to rectangular bars either. Many rifles have decorative banners, thumbnail finials, even hands, eagles, and other creatures inlaid for signature escutcheons.